This is an updated version of the blog I made years ago on generating synthetic data with Blender to fine-tune a YOLO model, if you're looking for that blog, you can find it here.
Synthetic data is a powerful tool to get Machine Learning practitioners off the ground fast into a working model that can perform the task sufficiently well. In this two series we'll do just that for training Computer Vision model.
We'll pick a concrete real-world object detection task and train a Vision Transformer using synthetically generated image data using Blender, while making sure we are evaluating this model on the real-world target distribution.
Introduction
This tutorial will walk you through fine-tuning a Vision Transformer on synthetic data to perform object detection.
We'll use the sdg-engine package to generate the data with Blender, fine-tune a DEtection TRansformer (DETR) model using the HuggingFace 🤗 transformers and datasets libraries, and validate its performance against one of the open source "BOP: Benchmark for 6D Object Pose Estimation" benchmark datasets [1].
This tutorial is divided in two parts:
- Part 1: Generate data using Blender: this part focuses on setting up your Blender scene, your
sdg-package, generating your fine-tuning data, and pushing yourtrainandvalidationdatasets into the HuggingFace Hub. - Part 2: Fine-tune DETR on Synthetic Data: this part focuses on taking your
train, andvalidationdatasets and fine-tuning DETR using the HuggingFacetransformerslibrary.
By the end of this tutorial, you'll have created a synthetic dataset using Blender, trained a Vision Transformer on it, and evaluated its performance on an open source dataset — all with HuggingFace 🤗.
If you have any questions or comments regarding these tutorials, please let me know at github.com/federicoarenasl/sdg-engine/issues.
Let's dive right in!
Prerequisites
Before getting started with this part of the tutorial, please make sure you have the following software installed:
- Blender, you can follow the steps here to install Blender on your computer.
- The sdg-engine package as well as its ML dependencies (hence the
--with=torchflag), which you can do with the following commands:
Using the flag
--with=torchwill prepare us to run the second part of this tutorial.
The BOP Homebrew Dataset
The BOP benchmark has a multitude of diverse datasets. Given that our task is focused on object detection, I've picked the "HomebrewedDB: RGB-D Dataset for 6D Pose Estimation of 3D Objects" dataset [2].
This dataset has a multitude of scenes with different objects rotating on a platform, and for simplicity we'll fine-tune our model to detect objects in only one of their scenes — scene No. 3 — shown below:
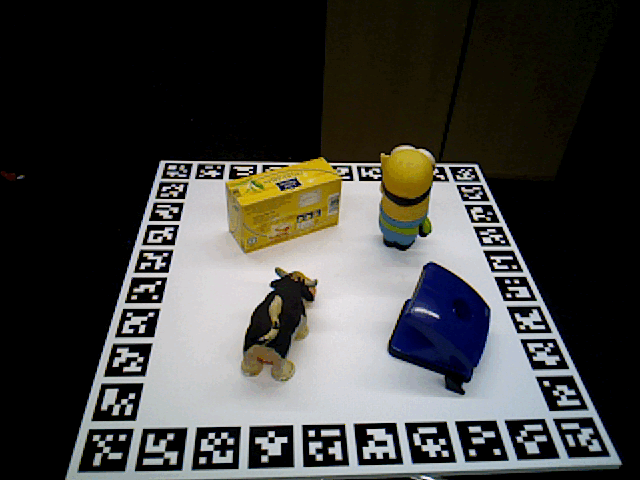
Sample from the Homebrew BOP dataset showing 4 different objects on a rotating platform
TIP: As the dataset name suggests, it was created for more than just object detection. However, its structure is very well suited for evaluating our own models fine-tuned for straightforward object detection tasks.
Prepare your validation dataset
The core benefit of using the Homebrew dataset in this tutorial is that it provides real-world ground truth that can be used for validating our model that was fine-tuned on synthetic data. Without an already labelled real-world dataset, we wouldn't be able to really measure our model's performance in the real world.
Let's prepare our validation dataset.
Download the raw validation data
Download the data from the BOP HuggingFace Organization, let's define some variables:
This lets us pull the validation images and labels using wget:
This leaves us with the ./hb_validation_dataset folder, from which we'll only use the files under ./hb_validation_dataset/003, as we are only using Scene No. 3 for simplicity.
Prepare the raw validation data into an imagefolder
Imagefolders [3] are simple file structures ready to load into an HuggingFace dataset. We'll convert our recently downloaded validation dataset located in DATASET_PATH, into an imagefolder located at IMAGEFOLDER_PATH ready for ingestion.
Next, we'll define some pydantic models to store our labels in:
Now we'll move our validation images into the IMAGEFOLDER_PATH, and collect the labels into a list of FormattedLabels.
Finally, go through the formatted_labels and save each as a line into metadata.jsonl file, necessary for the imagefolder to locate each image's annotations:
Push the validation dataset to your HuggingFace Hub
Now that the imagefolder is ready, you can simply load it from your IMAGEFOLDER_PATH:
Finally push it to the HuggingFace Hub:
Warning: keep
private=Trueso that we are not transgressing any BOP distribution licenses.
Wohoo! There we have our validation data ready to pull, now onto [generating] the fine-tuning data!
Generate your synthetic fine-tuning dataset
We'll use my own sdg-engine package, a Python package that interfaces easily with a Blender scene to generate Object Detection synthetic annotations.
As inputs, it needs:
- The Blender scene, and
- The
YAMLconfiguration file which prescribes how to generate the data
It outputs an imagefolder ready to push into the HuggingFace Hub.
The Blender scene: Inspect the Homebrew scene
So that you don't have to create it from scratch, I've included a basic scene with all the necessary setup. You can download this scene from ./sdg-engine/tutorials/train-detr/bop-hb-3.blend. Opening the scene in Blender should show a workspace similar to the one below.
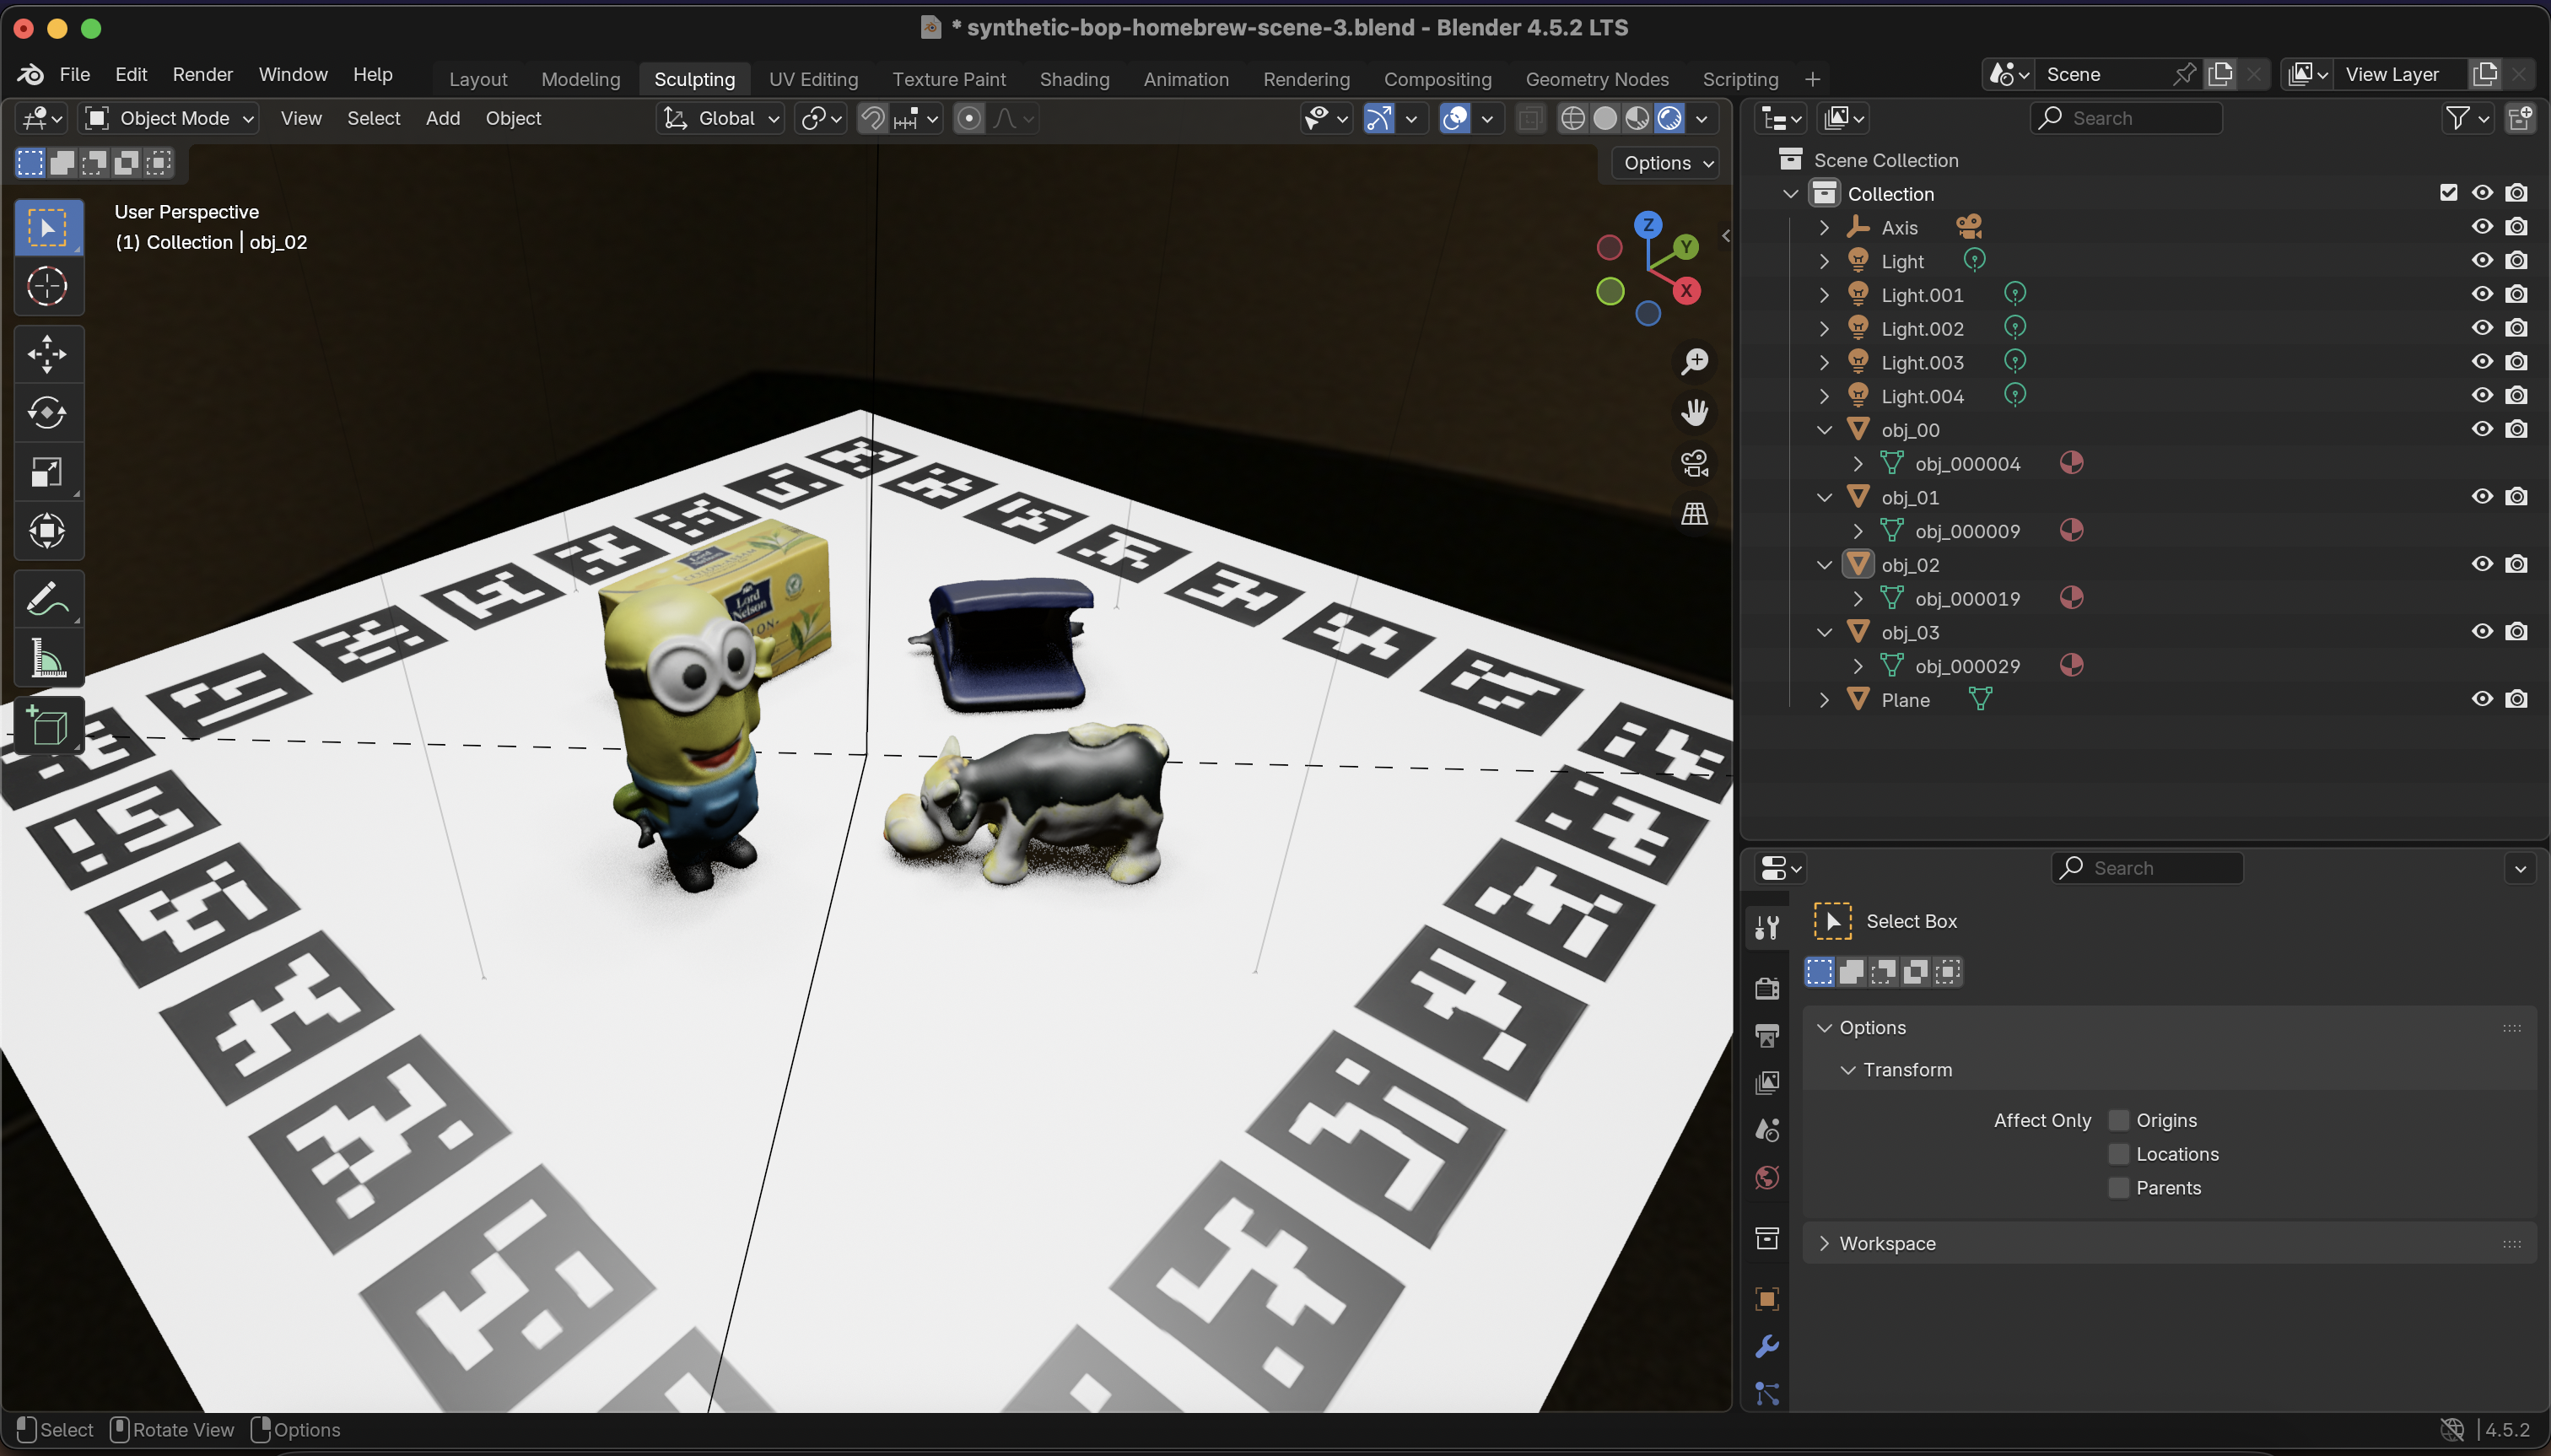
Quick overview of the HB Blender scene
Tour around the scene, play with the lights, get acquainted with the structure of the scene.
I've refrained from spending too much time improving the scene's photorealism, but obviously whoever's reading this is encouraged to play around with this. When we've fine-tuned our model, we'll come back to this as one of the main axis of improvement for the performance of our fine-tuned model.
The YAML configuration file: Create SDG job configuration
As part of the sdg-engine package functionality I decided to let users configure the synthetic data generation via a simple config.yaml file, which prescribes how the data will be generated. It's far from perfect, and I encourage any reader to find bugs and limitations :).
Below is the bop-hb-small.config.yaml, which generates around 300 images and their annotation thanks to its sweep_config:
The full configuration can be found in ./sdg-engine/tutorials/train-detr/bop-hb-small.config.yml, use this configuration to get acquainted with the data generation. Once you are ready to generate the final dataset, switch it to bop-hb-large.config.yml.
Tip: some pointers as to what each field means:
engine: blenderdirectssdg-engineto use Blender as the SDG engine, currently this is the only supported rendering engine.check_visibility: trueruns a raycast function to only include the visible pixels of each object in the image as part of the output bounding box. Set it tofalsewhen speed is necessary and your scene doesn't have too many occlusions.debug: trueis super handy to quickly visualize the result of different configurations, set it tofalsewhen you are ready to submit a big job.
Generating the fine-tuning data
Now that everything's in place, we can generate the data by just running the command below:
Push your synthetic dataset into the HuggingFace Hub
Push your generated fine-tuning dataset into the Hub:
Now the synthetic fine-tuning dataset is ready to pull from the HuggingFace Hub.
Putting it all together
Great! By now you should have two datasets living in your HuggingFace Hub:
- A real-world validation
dataset, collected from a widely used open source benchmark - A synthetic fine-tuning
dataset, generated by you using Blender
With these two datasets we are ready to move onto the next part of this tutorial: Part 2: Fine-tune DETR on Synthetic Data, see you there!
[1] BOP Benchmark – 6D Object Pose Estimation If you’re working on 6D pose estimation, you’ll almost certainly run into BOP. It’s the go-to benchmark for comparing methods, with well-defined datasets, metrics, and evaluation scripts that make results easier to reproduce and compare.
[2] HomebrewedDB (ICCVW 2019) A practical RGB-D dataset for 6D pose estimation, introduced at an ICCV workshop. It focuses on more realistic, messy scenes (clutter, occlusion, imperfect captures), which makes it a nice complement to cleaner benchmark datasets.
[3] Hugging Face Datasets –
ImageFolderA handy utility for loading image datasets straight from a folder structure—no custom dataset code required. Great for quick experiments, baselines, or when you just want to get a vision model running without too much setup.